After creating the following Cipher Profile Options, they need to be configured. Each profile options is set to be configurable at the Site, Application, Responsibility, or User level. By default, there should always be a Site level configuration.
- Cipher: API Key
- Cipher API keys are generated from the Cipher Application Profiles page. Without an API key EBS will be unable to use Cipher APIs.
- Cipher: Instance Name
- Cipher is capable of hosting multiple instances that can work with multiple environments. This is set to the Cipher instance name you want this particular EBS environment to communicate with.
- Cipher: Web Service URL
- This is set to the Cipher application web URL that hosts the API key and the Cipher instance name set in the other profile options.
Oracle profile options can be configured using the System Administrator responsibility.
- System Administrator -> Profile -> System
The following configuration examples will show only the site level configuration. You are left to configure these profile options for any specific application, responsibility, or user levels.
Configure “Cipher: API Key”
The Cipher API Key is generated in the Cipher Application using the skipjack user or another user with the Full Admin Role or another Role with the Manage Profile permission.
To generate an API Key please perform the following:
- Log into the Cipher Application with the skipjack user or a user assigned the Full Admin role or another Role with the Manage Profile permission.
- Once logged in click on the gear icon
 in the upper right-hand corner of the top menu and click on the Profiles menu option.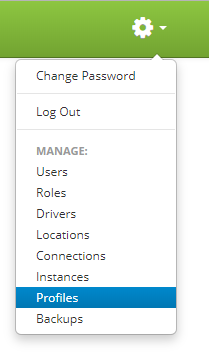
- Under the “Portal Access Tokens” section click on the “+ Add Access Token” or use an existing token if present. There can be more than one token present. Each token is a valid API Key.
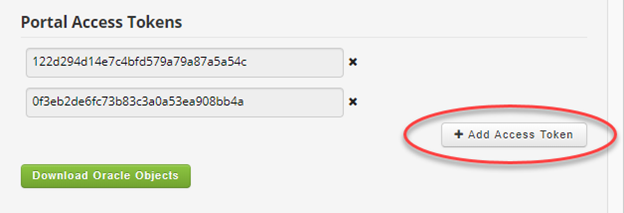
- Copy the portal access token that you generated in the previous step.
Once you have your API Key from Cipher, perform the following:
- In EBS navigate to the System Administrator Responsibility and go to Profiles -> System.
- Check the site checkbox and enter “Cipher: API Key” in the Profile input. Then click find.
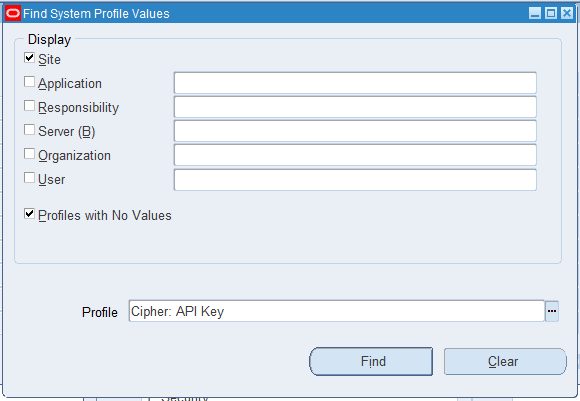
- Paste the token into the Site input or one other inputs for the Cipher: API Key.
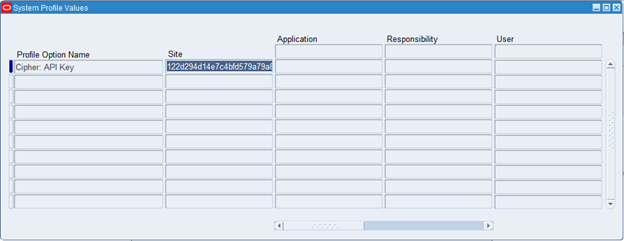
- Click Save in the tool bar.
Configure “Cipher: Instance Name”
Cipher is capable of hosting multiple instances. This profile option sets the Cipher instance you want used. You can get the instance name from the Cipher application using either the skipjack user or another user with the Full Admin Role or another Role with the View Instances permission.
To view a list of Cipher instances please do the following:
- Log into the Cipher Application with the skipjack user or a user assigned the Full Admin role or another Role with the View Instances permission.
- Once logged in click on the gear icon
 in the upper right-hand corner of the top menu and click on the Instances menu option.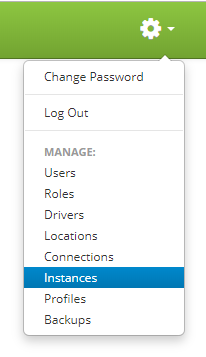
- Get the name of the instance from the list provided or create a new instance to use.
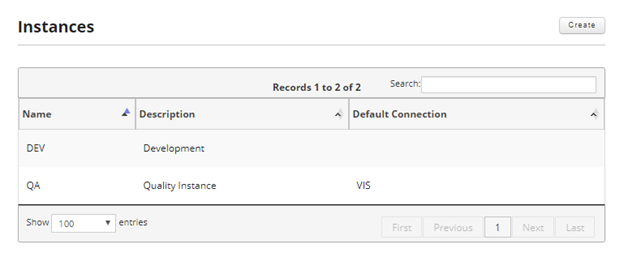
Once you have the Cipher instance name you want to use, perform the following:
- In EBS navigate to the System Administrator Responsibility and go to Profiles -> System.
- Check the site checkbox and enter “Cipher: Instance Name” in the Profile input. Then click find.
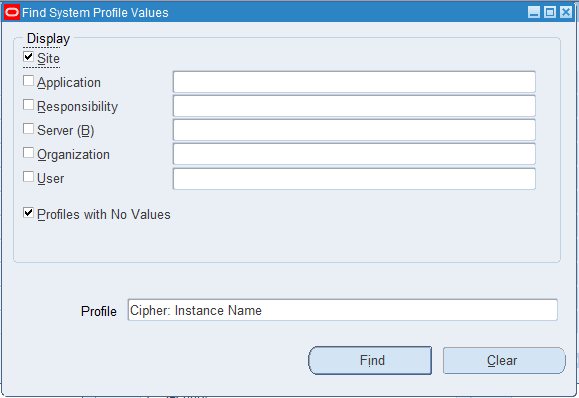
- Enter the Cipher Instance Name into the Site input or one other inputs for the Cipher: Instance Name.
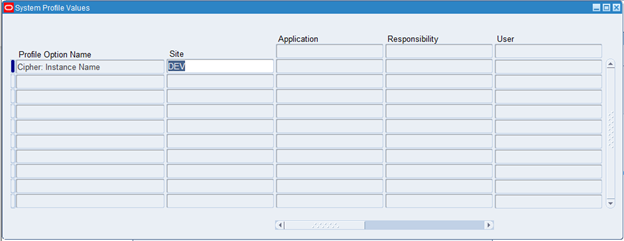
- Click Save in the tool bar.
Configure “Cipher: Web Service URL”
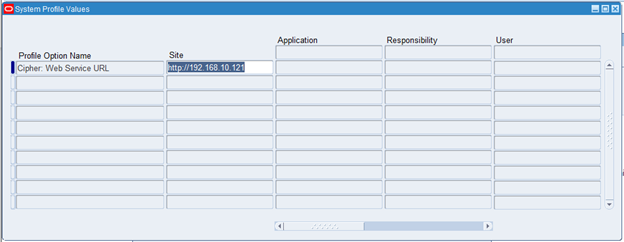
This profile option defines the Cipher application URL to be used. Set this to either the hostname or the IP address of your Cipher installation.
- In EBS navigate to the System Administrator Responsibility and go to Profiles -> System.
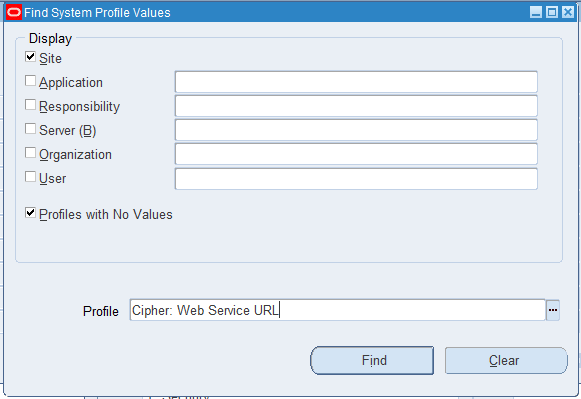
- Check the site checkbox and enter “Cipher: Web Service URL” in the Profile input. Then click find.
- Enter the URL to your Cipher installation into the Site input or one other inputs for the Cipher: Web Service URL.
- Click Save in the tool bar.